How To Remove Eyelash Extensions- Lash Artist Guide

Thanks to the mega boom of lashes in the beauty industry, millions across the globe have joined the glamorous world of eyelash extensions. And chances are, being a professional lash technician, you have applied more lashes than you can count. But as all good things must come to an end, your clients have to say goodbye to their lash extensions at one point or another.
When it comes to being a professional lash technician, safely removing eyelash extensions is just as important as properly applying them. That is why it's always a great idea to expand your knowledge and perfect your skill set. In today's article, we want to take you through all the best tips and tricks of correctly removing eyelash extensions and what not to do during the procedure. So, make sure you stick around and become a better expert in no time!
When To Remove Eyelash Extensions
Before we jump into the steps, let's quickly discuss when you should remove eyelash extensions. As a lash professional, you are well aware of the natural eyelash shedding that occurs every 6 to 8 weeks. As natural lashes go through their life cycles and growth stages, these hairs slowly begin to fall out. Logically, the attached lash extensions experience shedding as well.
It is because of these growth cycles that you see your clients and customers regularly. More often than not, your clients show up with noticeable gaps along their lash lines, and seeing these gaps is a good indication that outdated lash extensions need to be removed.
Eyelash Tools and Products For Lash Removal
Just like any other beauty treatment and procedure, removing lash extensions requires specific tools and products. So, before your client sits down on the chair and the removal process begins, make sure you have all the necessary products by your side.
Here are all the tools you'll need for a lash removal: a professional eyelash glue remover, under-eye pads, lint free adhesive wipes, micro swabs, lash extension tweezers, and a towel to create the optimal comfort for the client. Our store offers gel or cream-based eyelash removers that work wonders on removing the individual lash extensions.
Eyelash remover cream is thicker in texture and can take off a part of the entire set of lashes. Eyelash remover gels are also great if you want to detach two lash fibers at a time. On the other hand, gel-based removers are thinner in consistency and are much more frequently used amongst lash technicians.
How To Safely Remove Eyelash Extensions On Your Clients
With all of your helpful tools and products ready, it's time to start the removal process.
Step 1: Eyelash Pads
The first step in removing eyelash extensions is making sure your clients and customers are comfortable and ready. Begin the process by placing a gel or a cotton pad under the lower lash line. By protecting the under-eye area, you won't have to worry about the lash extensions irritating your client's delicate skin. But the pads can also be a great benefit to you!
With the high contrast of the white under-eye pads against the black lashes, you'll have a better visual of what you are doing and which lashes to remove. And for a more efficient approach, you can even temporarily place the detached lash fibers onto the pads.
Step 2: Eyelash Remover
As you know, every professional lash extension procedure is done with the help of powerful lash glue. Thanks to the incredibly binding chemical composition, cyanoacrylate allows the lash fibers to attach for a couple of weeks. That is why a strong adhesive needs an even stronger dissolver.
The very next step is all about removing the extension glue. Begin by coating a few micro swabs with the eyelash glue remover. Separate the lashes one by one, and begin gently applying the product onto the lash extensions. Be careful not to get any product on the eyelid, as it may cause some discomfort to the client.
As this step requires a lot of attention and skill, we highly suggest you take your time and not rush the process. Once you've spread the gel or cream all over the lashes, you can wait for about 3 to 5 minutes before you can begin removing each individual lash.
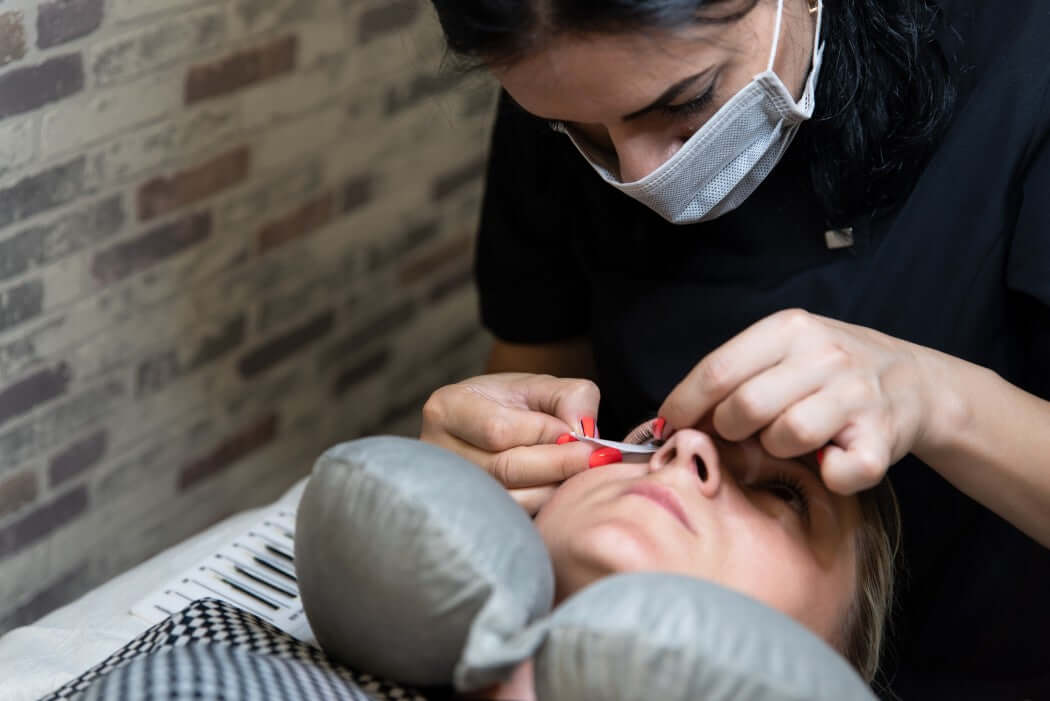
Step 3: Removing Eyelash extensions
Now that the eyelash remover has dissolved the strong adhesive, you can go ahead and start taking off the attached lash extensions. For this step, make sure you have lash tweezers and lint free adhesive wipes by your side. Then, it's time for the removal process.
One by one, again - being very gentle, kick-off by removing each lash extension with the help of your tweezers. As the eyelash remover has done its job, taking off the extensions will only require simple sliding motions. For a quick clean-up, place lint free adhesive wipes on top of the under-eye patch to store and catch the detached lash fibers.
After about 10 to 15 minutes, all the lash extensions should be safely removed and placed on top of the lint free adhesive wipes. Using a clean micro swab, make sure you take off any excess or remaining eyelash remover on the lash line.
Step 4: Clean The Eyes
And our final step into properly removing eyelash extensions is to focus on getting the eye area clean and clear of any glue residue and fiber remnants. Grab a couple of clean cotton pads and dip them in water. Then, once the pads have been rinsed, swipe them across the client's lash line, cleaning up the area as you go.
For the final touches, dry the eyes and the lashes using soft towels or clean mascara wands, and voila! You have just mastered the art of correctly removing eyelash extensions without causing any discomfort or irritation to your trusted clients and customers.
Pro Tips & Tricks
As you see, lash extensions can be removed without much hassle. But don't be fooled - as this process requires expertise and meticulous work. And so, if you want to perfect and improve your skillset, here are some professional tips and tricks you can use.
A great tip to live by is to not rush the glue removing process. What do we mean by that? Beginner lash technicians are often too confident when applying the dissolver - thinking it can break down the lash glue in just one minute. This results in some technicians prematurely pulling and tugging at the lash fibers, even though the glue hasn't fully dissolved yet.
Having said that, you also don't want to leave the remover on for too long. After some time has passed, the glue remover can change consistency and texture and irritate the eye. After all, this process should be painless and super comfortable for the client. So, the optimal time is about 3 to 5 minutes on the lash line.
Giving Lash Advice To Your Clients
While we are on the topic of tugging at the eyelashes, let's discuss some of the helpful information you can pass on to your clients. Many believe that creating and maintaining beautiful eyelashes is a team effort - requiring both professional expertise, as well as client accommodation.
Once the lashes have been applied, your clients should be educated on how to take care of them not to cause their natural lashes any damage or irritation. Along with avoiding all moisture for the first 24 hours, your clients should also be aware of messing with the extensions. Over time, as natural lashes begin to shed, lash enthusiasts will notice their extensions get flail and flimsy, leading to the urge to pull and tug at the hairs.
Even though plucking at the lash extensions seems very easy to do, it's something your clients should not participate in. Not only will this cause unnecessary eye irritation, and in some cases, even infection, but it may even lead to massive gaps along the upper lash line. But what can your clients do if they can't get away from loose lash fibers?
The best way to tackle flail eyelashes is to schedule regular fills. As natural lashes are shed every 40 to 60 days, your clients and customers should be aware of accommodating these growth cycles. So, next time a new customer and lash beginner walks into your salon, make sure they set up the next appointment before they get out of the beauty chair.
And there we have it! The correct and proper steps into removing eyelash extensions without creating any discomfort for our beloved lash lovers. Thanks to these professional tips and tricks, you'll have all the necessary knowledge and tools to confidently remove and detach every single lash fiber. Not to mention how your clients will appreciate your expertise and the helpful information you'll provide them.
Tagged: